Brad nails are great for light woodwork, but when they stick out, they cause problems. A visible nail ruins the finish. A sharp one can hurt someone. This guide explains how to fix and prevent brad nails from sticking out—step by step.
What Are Brad Nails and Where Are They Used?
Brad nails are thin, lightweight nails, usually 18-gauge, used in light woodworking. Their small size makes them perfect for:
- Trim and molding
- Furniture parts
- Small wood panels
- Craft projects
Brad nails hold well and leave small holes, so they’re ideal for projects where appearance matters.
Why Brad Nails Stick Out
Here’s why your brad nails might not go all the way in:
- Nail is too short or long for the material
- Air pressure is too low or too high
- Nailer is angled incorrectly
- Wood is too hard or full of knots
- The nailer has a jam or needs cleaning
Fixing these issues means smoother, cleaner work—and safer results.
Choose the Right Nail Length
Nails should be 2 to 3 times longer than the material being attached. Also, they should penetrate at least ¾ inch into the base wood.
Example:
- Attaching ½ inch trim? Use 1½ inch brads.
- Fastening ¾ inch plywood? Use 1¾ to 2 inch brads.
Short nails won’t hold. Long ones may curve or pop out.
Brad Nail Gauges Explained
- 18-gauge: This is the true brad nail size. Best for trim, light furniture, and decorative woodwork.
- 16-gauge: Often considered finish nails. Stronger than brads, but not for delicate work.
- 15-gauge: Always finish nails. Too thick for brad nailers.
Tip: Never load 15- or 16-gauge nails into an 18-gauge brad nailer. It will jam or break.
Set the Right Air Pressure
Check your nailer’s manual first. But here’s a good starting point:
- 18-gauge brad nailers work best at 60–80 PSI
- Some models need as little as 50 PSI
- Too low = nail sticks out
- Too high = nail overdrives or splits wood
Adjust pressure based on the type of wood you’re working with.
Tools You Need to Fix Brad Nails
Here’s a quick checklist:
Required
- Safety glasses
- Safety gloves
- Pliers or end nippers
- Nail punch or nail set
- Hammer
- Wood filler
- Sandpaper (150–220 grit)
Optional
- Nail puller
- Manual finish hammer
- Tack cloth or vacuum
- Moisture meter (for advanced accuracy)
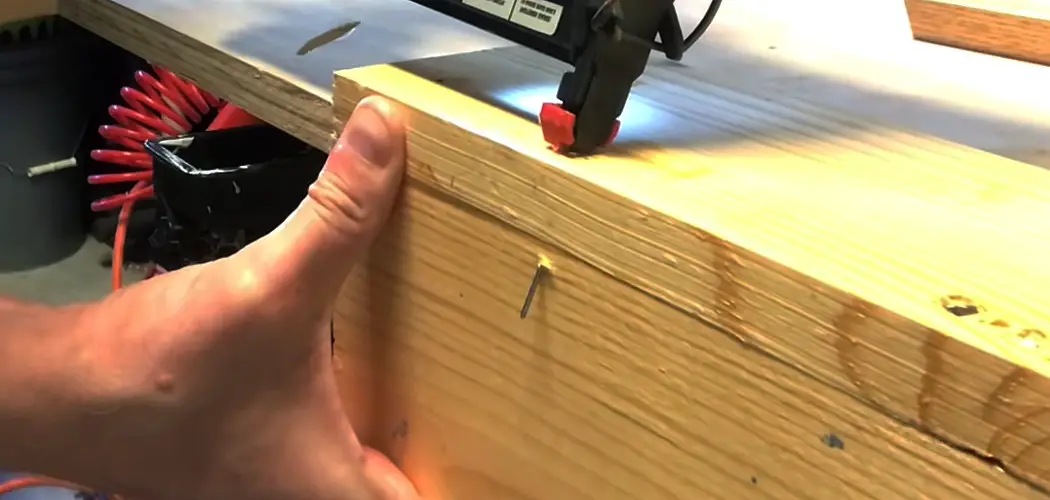
How to Fix Brad Nails Sticking Out
Follow these simple steps:
- Put on safety glasses and gloves.
- Check the nail. If it’s bent or sticking out of the edge, pull it out.
- Cut the tip using end nippers if it sticks out of the surface.
- Drive the rest in. Use a punch or screwdriver and hammer to tap it below the surface.
- Fill the hole with wood filler. Follow the label for drying time (some take hours).
- Sand the area once the filler is dry.
- Stain or paint to match the surrounding wood.
Result: Clean, flat finish with no sharp edges.
How to Prevent Brad Nails from Sticking Out
1. Prepare the Wood
- Work on a flat, clean surface
- Don’t avoid knots—just adjust your angle when near them
2. Use the Correct Angle
- Keep the nailer flat and steady
- Don’t tilt or twist when firing
3. Check Nail Size
- Match the nail to the material’s thickness and the project’s strength needs
4. Test on Scrap First
- Always fire 1–2 nails into scrap wood from the same batch
- Adjust air pressure if needed
5. Control the Environment
- Wood expands or contracts with humidity
- Let wood sit in your workspace for 1–2 days before use
- Use a moisture meter for accuracy in pro work
6. Keep Your Tool in Good Shape
- Clean your brad nailer regularly
- Oil it if the manual says so
- Clear jams before loading new nails
Safety Rules to Follow Every Time
Brad nailers are easier to handle than heavy-duty nail guns, but they’re still dangerous. Follow these safety tips:
✅ Wear safety glasses
✅ Keep hands away from the nail path
✅ Use sequential fire mode if available (safer)
✅ Disconnect the air hose before fixing jams
❌ Never dry-fire (shoot without nails loaded)
❌ Never point the tool at yourself or anyone else
Work slow. Stay focused.
Tips for Better Results on Different Woods
Softwoods (like pine):
- Use lower pressure (60–70 PSI)
- Nails may go in too deep if pressure is too high
Hardwoods (like oak):
- May need higher pressure
- Go slow and watch for bending
Knots or grainy areas:
- Nail at a slight angle
- Use shorter nails if bending happens
How to Countersink Brad Nails for a Clean Finish
To hide brad nails:
- Tap the nail below the surface using a punch tool
- Fill the hole with matching wood filler
- Let it dry (check the product label)
- Sand it flush
- Refinish with paint or stain
This method works well for visible surfaces like cabinet doors or baseboards.
Common Nailer Issues and Fixes
| Issue | Cause | Solution |
| Nail won’t sink | Low PSI or dull driver blade | Increase PSI or clean tool |
| Nail overdrives | Pressure too high | Lower PSI |
| Nail bends or exits | Nail too long or angled shot | Use correct size, adjust aim |
| Tool jams | Dirty or bad nails | Clean and reload |
| Misfires | Worn piston or spring | Service or replace parts |
Should You Repair or Replace Your Brad Nailer?
- Repair it if:
- It’s under warranty
- The problem is minor (like a seal or spring)
- Replace it if:
- It’s old
- Repairs cost more than half the price of a new one
- Parts are unavailable
Keep your tools in good condition to avoid repeat problems.
How to Fill and Finish Nail Holes
- Apply wood filler with a putty knife
- Let it cure — some take 15 minutes, others several hours
- Sand with 150–220 grit
- Clean the surface
- Stain or paint to blend with the wood
Tip: Always test filler and stain on scrap before final use.
Final Tips
- Use the right brads for the job
- Adjust your air pressure correctly
- Practice on scrap before working
- Follow all safety steps
- Keep your nailer clean and in good shape
Brad nails sticking out are easy to fix and easy to avoid. A few small changes can save you time, money, and headaches.
Helpful? Share this guide with others.
Have a question or a tip of your own? Leave a comment!
Read Also – Fill a Screw Hole in the Wood for Reuse