The problem of hitch pins corroding is common, and it is understandable that the issues caused by rust would make anyone anxious. Moreover, the hitch pin can be corroded due to long-time rust; then, there is no option but to change it. With this in mind, I have compiled a detailed article on how to remove a rusted trailer hitch pin.
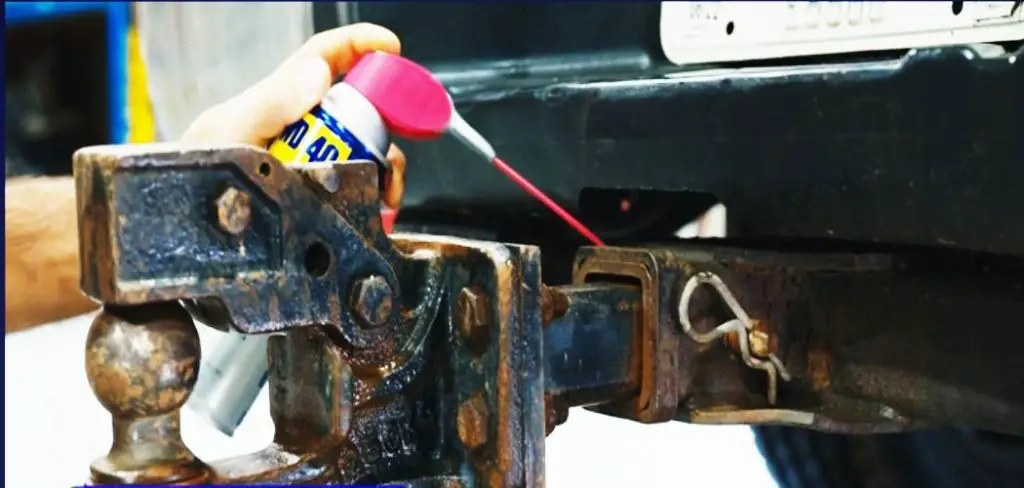
Table of Contents
Why Do Trailer Hitch Pins Rust?
The problem of hitch pins corroding is common, and it is understandable that the issues caused by rust would make anyone anxious. Rust can occur for a number of reasons, including exposure to moisture and friction. If left exposed to the air, metal will eventually rust over time.
How to Remove a Rusted Trailer Hitch Pin?
Hitch pins can become corroded over time due to exposure to the elements, making them difficult to remove. There are two types of hitch pins commonly used in trailers: receiver lock hitch pins and hitch pins with clips. Follow the instructions below to remove rust from either type of hitch pin.
Receiver Lock Hitch Pin Removed:
To remove a corroded receiver lock hitch pin, you will need to destroy the lock. This will render the hitch pin unusable, so it will need to be replaced.
Use an Angle Grinder and Hammer.
- If you see a small space to work with, use a reinforced inox cutting wheel size of 4.5 inches. This is the smallest cutting wheel size, and it will be easier to maneuver in a small space. You will need a 4.5-inch angle grinder for this project.
- Set the reinforced inox cutting wheel on the angle grinder. Smooth and finish the cut from the starting edge of the receiver lock hitch pin.
- After cutting with the angle grinder, use a hammer to hit the pin until it is out from the other side.
Safety and Extra Tips :
- You can also use this method with a hitch pin with a clip.
- Always wear appropriate safety gear, including eye and ear protection, when using an angle grinder.
- The guard helps protect you from flying debris and sparks.
- Wait to put the grinder down until the disc has stopped rotating.
Use a Screwdriver and Hammer:
My friend Chuck told me about a simple method that only requires a screwdriver and hammer.
- Set a flathead screwdriver inside the lock hole of the receiver lock hitch pin. Use a hand hammer to hit it until the head of the screwdriver is completely inserted.
- To loosen the inside of the lock hitch pin, use a hammer to hit it around the face side several times.
- Insert a screwdriver into the lock hole and press down to remove the inner mechanism. It may take some time to come out.
- Now you can remove the screw from the lock pin joint and the two parts from both sides.
Hitch Pin With the Clip Removed:
If these pins get rusted, they will get stuck in the hole, and you will face much trouble trying to remove them. Here’s an easy way to get them out of the hole.
Use WD 40 and Hammer:
- Apply rust killer WD 40 to the receiver hitch hole on both sides of the hitch pin 10 to 20 minutes before. Make sure the WD 40 gets in there at least a little bit. If your hitch pin clip is stuck due to rust, remember to put it there too.
- The trailer hitch pin should be loosened with a hammer. Use the hammer so as not to damage the receiver hitch.
Conclusion
If you are struggling with this issue, the information in my article can help you. I hope you found it helpful. If you did, please share it with your friends or family members who may also be struggling with this issue. It is a common problem, so they will likely appreciate your help. Thanks for reading!