Ever tripped over cables or had a jungle of wires behind your stuff? I feel your pain! Let me share how I discovered the awesome world of cable clips.
I’ll walk you through the simple steps to use cable clips on your skirting boards – no tech skills required, promise! We’ll make sure those skirting boards are ready for action, too.
And don’t worry; we’ll talk about safety and why organized cables aren’t just about looks – it’s safer too.
So, let’s dive in, and soon you’ll be a cable clip pro. Say goodbye to the mess and hello to a neat space. Ready? Let’s roll!
Simple Steps to Use Cable Clips on Your Skirting Board
You’ll need –
- cable clips (make sure you have the right size),
- a clean skirting board, and
- the cables you want to organize.
- Plan the cable position:
Choose the placement of the cable clips along the skirting board, aiming for a flush position with the floor. This way, they seamlessly blend in with the carpet, preserving the aesthetics of your home while keeping things hassle-free.
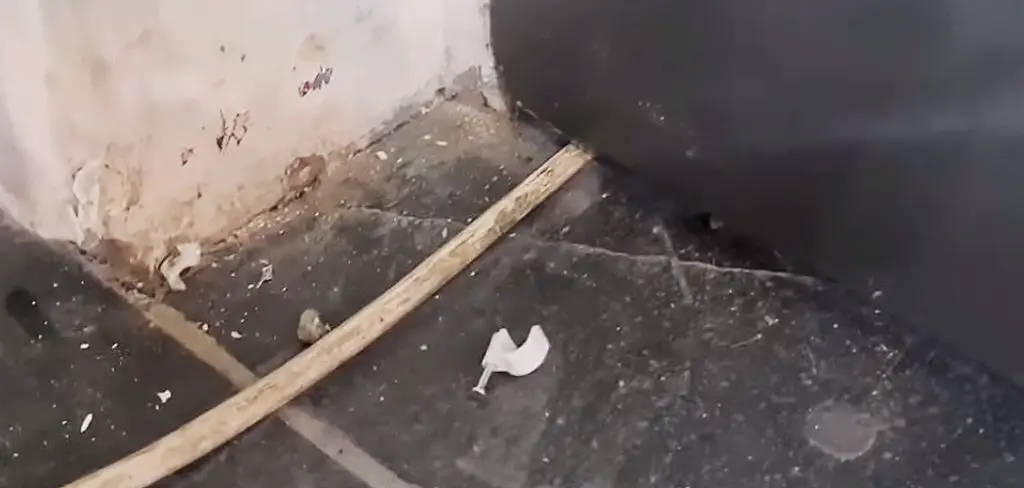
Step 1 – Clean the Skirting Boards Area
Before installing the cable clips, having a clean and clear space in front of the skirting boards is crucial. If there’s furniture, dirt, or any obstacles, it can lead to interruptions and potential mistakes during the installation process. So, take the time to ensure the area is free from dust and debris, giving you a smooth and error-free installation experience.
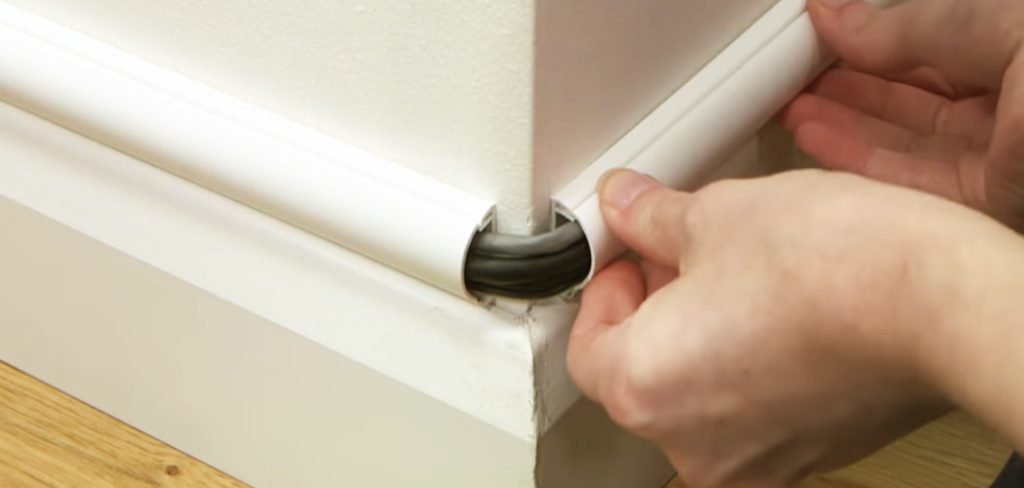
Step 2 – Place the Cable
Organize the cables in alignment with your plan along the front of the skirting board. This strategic arrangement enhances the overall organization of your work. Pay particular attention to ensuring the cables align flush with the skirting board, particularly at the corners of the board.
Step 3 – Attach the Clips
Pin Cable Clip
- Position the pin side of the Cable Clip facing upward, then insert the cables into the clip.
- Keep the cable snug and gently tap the pin with a hammer.
- Continue this process, installing the next clip at a maximum distance of 30 cm between each clip.
Self-Adhesive Cable Clips
Self-adhesive clips come with adhesive backing to easily stick onto the skirting board. Peel off the paper from the back of these clips and affix them to the bottom of the skirting board. Once in place, insert the cables into the self-adhesive clips.
Done!
Note: Decide beforehand where you’ll leave extra cable length. There’s no going back once the cable clips are installed – the cables can’t be pulled back.
Maintenance and Safety
After you’ve affixed the Cable Clips to the Skirting Board, ongoing maintenance isn’t necessary. However, ensure to avoid causing any damage to the Clips while cleaning your house or performing other tasks.
If, at any point, you need to remove a cable from the clips, do so carefully with the assistance of a screwdriver. The key here is to avoid forcefully pulling the cable out; this can lead to instability and looseness in the clips. By gently using a screwdriver, you can safely extract the cable without causing any harm to the clips or compromising their functionality.
This is how you can maintain a tidy and organized cable management system without worrying about accidental damage.
Are There Any Alternatives to Cable Clips for Cable Management on Skirting Boards?
Yes, absolutely.
The D-Line Mini Cable Trunking is popular for managing cables along skirting boards. These trunkings come in a range of attractive decorative styles, contributing to an enhanced visual appeal of your room.
Furthermore, an alternative approach involves concealing cables by carefully cutting into the rear of the board. However, this method involves intricate work that professionals best handle due to its complexity.
It’s important to note that this technique has a drawback – once implemented, adjusting or adding cables becomes challenging. Unlike t other solutions, you won’t have the flexibility to modify your cable arrangement as you wish. T
FAQ’s
How Many Cable Clips Do I Need for a Specific Length of Skirting Board?
To determine how many cable clips you need for a specific skirting board length, aim to place them no more than 30 cm apart. This spacing provides good support for the cables. For instance, if your skirting board is 2 meters (200 cm) long, you’d need almost 7 or more clips to distribute the cables along it evenly.
What Types of Cable Clips Are Available, and How Do I Choose the Right Ones for My Needs?
Numerous cable clip types exist, including Screw-mount, Adhesive-mount, Nail-in clamps, Adjustable mount, Flat cable clamps, Cable spring clips, Steel P-clamps, and more. Each type has distinct features. However, the Nail-in/pin Cable Clips and Self Adhesive Cable Clips are the most appropriate options for home or office use.
Can I Use Cable Clips for All Types of Cables?
Yes, generally, you can use cable clips for various cables, including power cords, HDMI, Ethernet, and more. However, you must ensure that the cable clips you choose suit the cables you intend to manage. Different clips may have varying sizes, holding capacities, and designs, so selecting clips that match the diameter and weight of the cables you plan to secure is a good idea.
Can I Remove Cable Clips From the Skirting Board Without Damaging It?
Yes, in most cases, you can remove cable clips from the skirting board without causing significant damage. The removal process typically involves gently prying the clip away from the board’s surface. However, minor marks or adhesive residue might be left behind, depending on the type of cable clip and the adhesive used.
Do Cable Clips Work on All Types of Skirting Boards?
Cable clips are suitable for wood, fiberboard, and PVC skirting boards. However, they are not effective for metal skirting boards, except for adhesive clips.
Conclusion
In conclusion, cable clips are a fantastic choice for keeping your cables organized and maintaining a tidy, hazard-free environment.
Now that you have this valuable knowledge, why not take the next step? Share this information with your friends and family, especially those who might benefit from a neater cable setup. Let’s help everyone say goodbye to cable chaos and hello to a more organized space!
If you have any questions or want to share your experiences, please, comment below.
Thank you for taking the time to read the article.