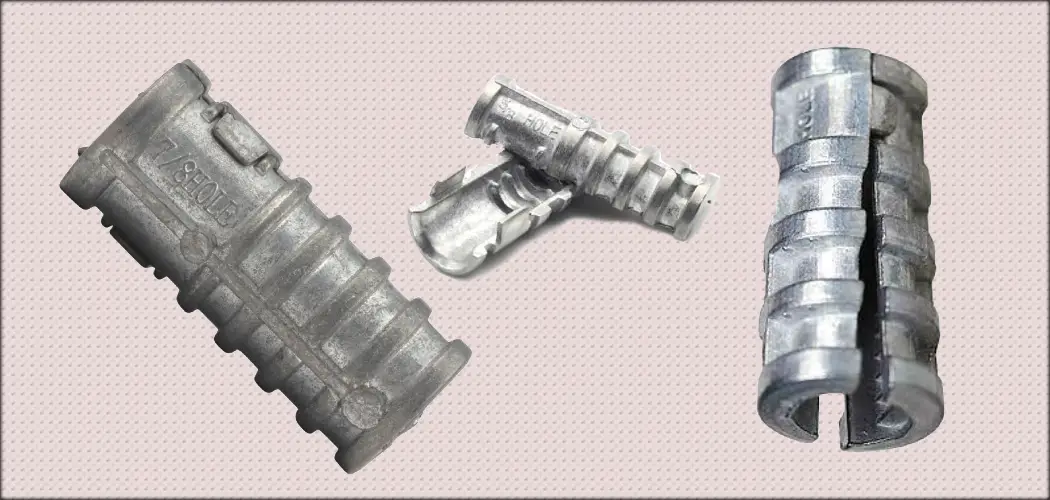
A lag shield is a two-piece masonry anchor designed to hold heavy items securely against solid surfaces like concrete, brick, or stone.
It works by expanding tightly inside a pre-drilled hole when you drive a lag screw into it.
The expansion creates friction and grip, locking your fixture into the masonry.
If you need to mount shelves, railings, signs, or heavy machinery into hard surfaces, lag shields are a strong, simple, and reliable choice.
They are valued for being easy to use, durable, and cost-effective compared to other heavy-duty anchors.
Types of Lag Shields
Short Lag Shields
- Best for: Shallow holes and thinner walls.
- Features: They are compact and create a solid hold even when you cannot drill deep.
- Common uses: Mounting handrails on thinner concrete steps, lightweight shelves, and outdoor fixtures where wall thickness is limited.
Tip: Always check wall depth before choosing short shields. Avoid overloading.
Long Lag Shields
- Best for: Deeper holes and heavy-duty anchoring.
- Features: They penetrate further into the wall, offering a stronger and more stable hold.
- Common uses: Heavy shelving units, industrial machinery, commercial handrails, and structural supports.
Tip: For heavy vibrations (like in factories), long lag shields offer better reliability and safety.
Common Uses
You’ll find lag shields used in various places and industries:
- Hanging shelves on brick or concrete walls
- Mounting handrails into concrete stairs or balconies
- Securing outdoor signs to stone facades
- Fastening factory equipment to floors and walls
- Attaching garage shelving systems or workbenches
- Supporting lighting poles and flagpoles onto concrete bases
Wherever strength and masonry meet, lag shields are a proven solution.
Materials
Lag shields are manufactured in several materials, each offering specific benefits:
- Zinc Alloy: Most common. Affordable, corrosion-resistant, and works well indoors and outdoors.
- Aluminum: Lightweight, rust-resistant, and excellent for marine or coastal applications.
- Steel: Offers maximum strength, ideal for industrial use, but must be galvanized or coated for outdoor exposure to avoid rust.
Tip: If your installation faces constant moisture, choose zinc or aluminum over untreated steel for long-term durability.
How to Install a Lag Shield
Follow these steps for a perfect installation:
- Drill the hole with a hammer drill and the correct size masonry bit (refer to the size chart below).
- Clean the hole thoroughly to remove dust. Use compressed air, a vacuum, or a brush.
- Insert the lag shield gently into the hole.
- Tap it flush with a hammer without damaging it.
- Place your fixture over the hole.
- Insert the lag screw into the shield.
- Tighten firmly using a wrench or socket set.
Pro Tip:
Drill straight to avoid misalignment and ensure maximum holding strength.
Tools You Will Need
- Hammer drill (for drilling into hard masonry)
- Masonry drill bits (match bit to shield size)
- Hammer (for tapping shields into place)
- Lag screws
- Wrench or socket set
- Safety gear (goggles, gloves)
Extra Tools (Optional):
- Compressed air blower or small brush (to clean the hole)
- Level (to ensure fixtures are straight)
Advantages & Disadvantages
| Advantages | Disadvantages |
|---|---|
| ✅ Strong holding power in tough materials ✅ Quick and straightforward installation ✅ Works in concrete, block, brick, and stone ✅ Rust resistance (with the right material) ✅ Handles heavy loads in industrial, commercial, and residential applications | ❌ Requires pre-drilled holes ❌ Not suitable for drywall, wood, or soft surfaces ❌ Removal can damage the masonry ❌ Over-tightening the lag screw can crack fragile materials like old brick or stone |
Size Chart
| Lag Shield Size | Drill Bit Size |
|---|---|
| 1/4 inch | 1/2 inch |
| 3/8 inch | 5/8 inch |
| 1/2 inch | 3/4 inch |
| 5/8 inch | 1 inch |
Important:
Always match your drill bit size carefully to the lag shield size to ensure a tight fit and maximum holding strength.
Weight Capacity
| Size | Shear Strength | Pull-out Strength |
|---|---|---|
| 1/4 inch | 400 lbs | 300 lbs |
| 3/8 inch | 800 lbs | 600 lbs |
| 1/2 inch | 1200 lbs | 900 lbs |
| 5/8 inch | 1500 lbs | 1100 lbs |
(Approximate values. Check manufacturer specifications for exact ratings.)
Note:
Shear strength measures side forces. Pull-out strength measures straight pulling forces. Always consider both for safety.
Lag Shields vs Other Anchors
| Anchor Type | Best For | Compared to Lag Shields |
|---|---|---|
| Expansion Bolts | Super heavy equipment | Stronger but harder to install |
| Wedge Anchors | Solid concrete floors and walls | Permanent and harder to remove |
| Chemical Anchors | Cracked or high-load masonry work | Strongest, but more costly |
| Plastic Anchors | Light loads, drywall, minor fixtures | Much weaker, not for masonry |
Quick Verdict:
Lag shields strike a good balance between ease of installation, cost, and strength for most heavy-duty masonry jobs.
Building Codes and Certification
- For home projects, basic lag shields often meet standard codes.
- For commercial, public, or critical structural projects, look for certified anchors:
- ICC-ES Certification (International Code Council Evaluation Service)
- UL Listings (Underwriters Laboratories)
Tip: Always confirm with local building authorities if you are unsure about required certifications.
Environmental Factors
- Moisture: Choose zinc or aluminum lag shields to avoid rust and corrosion.
- Temperature swings: Can cause materials to expand and contract. Select flexible anchors where possible.
- Vibrations: Use longer lag shields or consider adding lock washers to maintain tightness under vibration.
Bonus Tip:
In marine or outdoor settings, apply a bit of waterproof silicone around the hole before inserting the lag shield for added protection.
How to Remove a Lag Shield
Removing lag shields can be tricky, but here’s how:
- Unscrew and fully remove the lag screw.
- Insert a smaller screw slightly into the lag shield.
- Use pliers or a claw hammer to gently pull the shield out.
- If it’s stuck, you can drill it out using a slightly larger masonry bit, but be careful to avoid damaging the wall.
Note: Lag shields are generally not reusable after removal.
Regional Names
- United Kingdom and Australia: Often called “masonry anchors”.
- United States and Canada: Commonly referred to as “lag shields” or “lag screw anchors”.
Tip: Sizes and thread types may differ slightly between regions. Double-check specifications when buying internationally.
Typical Prices
| Material | Price Range (Each) |
|---|---|
| Zinc Alloy | $0.30–$1.00 |
| Aluminum | $0.50–$1.50 |
| Steel | $1.00–$3.00 |
Buying Tip:
Bulk packs (25, 50, or 100 pieces) significantly lower the price per piece.
Where Industries Use Them
- Residential: Mounting shelves, mirrors, TV brackets, railings
- Retail Stores: Hanging signs, shelving systems
- Industrial Facilities: Securing machines, conveyor systems, safety railings
- Public Buildings: Handrails, heavy door frames, outdoor sculptures
If you need a rock-solid anchor into a solid wall, lag shields are your go-to hardware.
History Snapshot
Lag shields originated in the early 1900s when construction needed faster, more reliable ways to fasten heavy objects into masonry without chiseling or specialty tools.
Modern versions are stronger, corrosion-resistant, and easier to install, making them a staple in construction, home improvement, and industrial settings.
FAQ
Where should I use lag shields?
Lag shields are best used in hard, solid materials like concrete, brick, stone, and masonry block. They are not suitable for drywall, wood, or soft surfaces. Ideal projects include mounting shelves, railings, signs, heavy equipment, and fixtures.
Can you reuse a lag shield?
Generally, no. Once a lag shield has been installed and then removed, it may lose its holding strength. Reusing it could lead to a weaker anchor and potential failure. For best safety and performance, always replace it with a new one.
Are lag shields weather-resistant?
Yes, especially if made from zinc alloy or aluminum, which resist corrosion. For outdoor or wet environments, choose shields labeled for exterior use to avoid rust and long-term damage.
What happens if I over-tighten a lag screw in a shield?
Over-tightening can cause the masonry around the lag shield to crack or the shield itself to deform. Always tighten firmly but not excessively. If using a torque wrench, follow the manufacturer’s recommended torque settings.
Can I use lag shields in hollow block walls?
Lag shields are primarily designed for solid materials. In hollow blocks, they may not grip properly and could pull out under load. For hollow block, consider using specialized anchors like toggle bolts or chemical anchors.
What if the lag shield spins in the hole while installing?
If a lag shield spins, the hole might be too large or dusty. Try cleaning the hole thoroughly and using a slightly larger lag shield. In some cases, using a chemical adhesive along with the shield can help it grip better.
Final Tip
Lag shields make heavy-duty installations easy and reliable. Pick the correct size, use quality materials, drill carefully, and tighten correctly — and you’ll enjoy a secure, professional result that lasts for years.
If you found this guide helpful, don’t hesitate to share it with friends, family, or colleagues who might benefit from the information.
Drop a comment below if you have any additional questions or personal experiences with lag shields. We’d love to hear how you’ve used them, any tips you might have, or challenges you’ve encountered. Your feedback helps others learn and grow.