Replacing old rivets on an aluminum boat with bolts can fix leaks, restore strength, and improve durability. However, doing it incorrectly can cause serious long-term issues such as galvanic corrosion or structural failure. This guide provides a step-by-step walkthrough, material recommendations, safety instructions, and expert insights to help you do it right the first time.
Why Replace Rivets with Bolts?
Aluminum boats often use rivets to fasten panels and structural sections. Over time, rivets may loosen due to vibration, corrosion, or hull flexing. Leaky rivets are one of the most common issues in older aluminum boats.
Reasons to switch to bolts:
- Easier to install and remove with basic tools
- Better water-sealing performance when used with marine-grade sealant
- More durable under stress if properly installed
- Allows reuse and adjustments during repairs
Tools and Materials Checklist (Don’t Skip This)
Before you start, prepare everything you need. Working efficiently reduces mistakes and ensures consistent installation.
Required Tools
- Electric drill (corded or cordless)
- Cobalt or carbide-tipped drill bits (10.5 mm and 12 mm suggested)
- Center punch for accurate drilling
- Calipers or metal thickness gauge
- Wire brush or deburring tool
- Socket wrench set or spanners
- Torque wrench (recommended for precise tightening)
- Clean rags and paper towels
- Clamps (optional, for panel alignment)
Safety Gear
- Safety glasses
- Nitrile or rubber gloves
- Dust mask or respirator (aluminum dust can be harmful)
- Hearing protection (if working with power tools in enclosed areas)
Installation Materials
- 316 stainless steel bolts (hex, truss, or pan head)
- 316 stainless steel flat washers and lock washers
- Isolation washers or bushings (nylon, plastic, or rubber)
- Marine-grade sealant:
- 3M Marine 5200 (for sealing, not bonding)
- G/flex 650 Epoxy (for structural bonding)
- TotalBoat Aluminum Boat Leak Sealer (non-structural, aluminum-safe)
- Marine thread locker (optional for vibration-prone areas)
- Backing plates (for transoms, seats, or stress points)
Pre-Installation Assessment
Before drilling, understand what you’re working with.
1. Identify Problem Rivets
- Look for rivets with visible gaps, movement, or signs of water seepage.
- Use a hose or water test to identify active leaks.
- Check both exterior and interior sides for signs of corrosion.
2. Structural or Non-Structural?
- Do not replace structural rivets (e.g., those in the transom, frame rails, bulkheads) without consulting a marine professional.
- Bolts are best used for:
- Hull panel fasteners
- Seats and brackets
- Gunwale or deck trim
- Low-load hardware attachments
3. Hull Thickness Consideration
- Use calipers to measure total thickness at each bolt location.
- This ensures correct bolt length and thread engagement.
IMPORTANT: Galvanic Corrosion and Isolation
What Is Galvanic Corrosion?
Galvanic corrosion occurs when two dissimilar metals (like stainless steel and aluminum) are in contact in the presence of water or moisture. This electrochemical reaction causes rapid aluminum corrosion, especially in saltwater environments.
How to Prevent It:
✅ Always install isolation washers or bushings between the bolt head and the aluminum hull.
✅ Use a nylon or rubber washer under the nut and bolt head.
✅ Avoid direct stainless-on-aluminum contact at all connection points.
✅ Apply a non-conductive barrier coating like Duralac or Tef-Gel to further reduce corrosion risk.
✅ Do not use zinc-plated steel bolts—these corrode even faster and accelerate damage.
Step-by-Step Guide: Replacing Rivets with Bolts
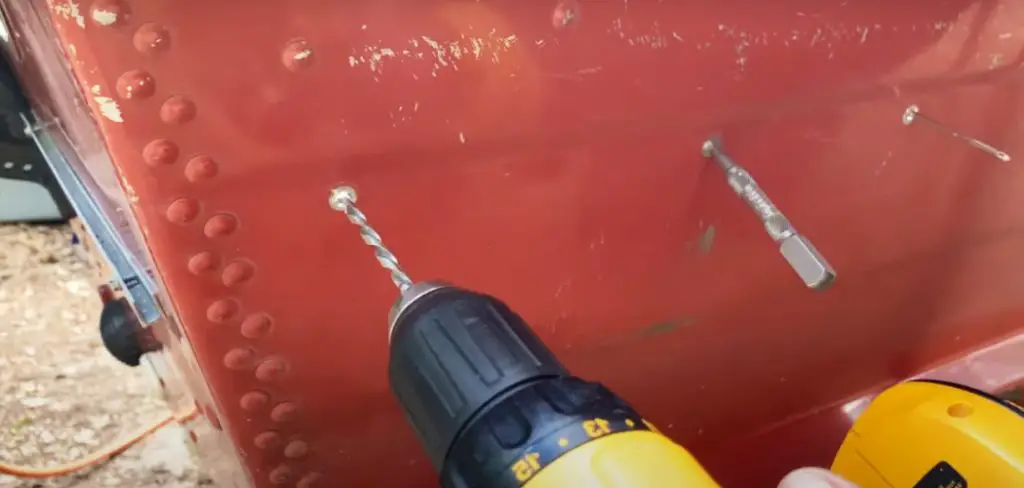
Step 1: Drill Out the Old Rivets
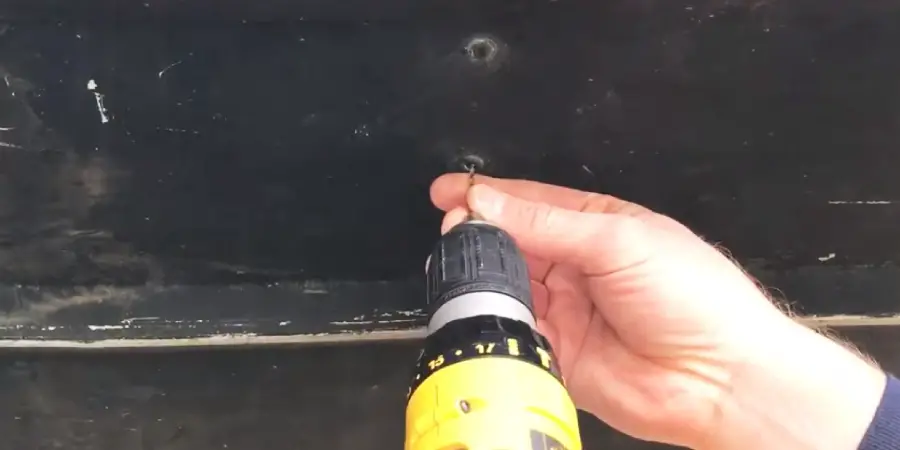
- Mark the center of each rivet with a punch to guide the drill.
- Use a cobalt or carbide-tipped drill bit for aluminum.
- Drill slowly and evenly to avoid spinning the rivet.
- If rivet spins: hold it with locking pliers or grind the head off.
- Remove the rivet body and clean the hole.
Step 2: Clean and Deburr the Hole
- Use a wire brush to remove shavings.
- Deburr sharp edges with a deburring tool or conical grinding stone.
- Clean the hole with solvent if using bonding adhesive.
Step 3: Measure and Fit the New Bolts
- Add 25 mm to the material thickness for correct bolt length.
- Ensure 1.5x bolt diameter of thread engagement minimum.
- For structural loads: consider 2x diameter + backing plate.
Example:
- Hull + bracket = 5 mm total
- Use an M6 bolt at least 30 mm long (5 mm + 25 mm)
Step 4: Apply Sealant and Isolation
- Apply a bead of marine-grade sealant (3M 5200 or similar) around the bolt shank and under the washers.
- Add isolation washers on both sides of the bolt hole.
- If using G/flex epoxy, coat the bolt and surrounding hole area, then allow full cure.
Step 5: Insert and Secure the Bolt
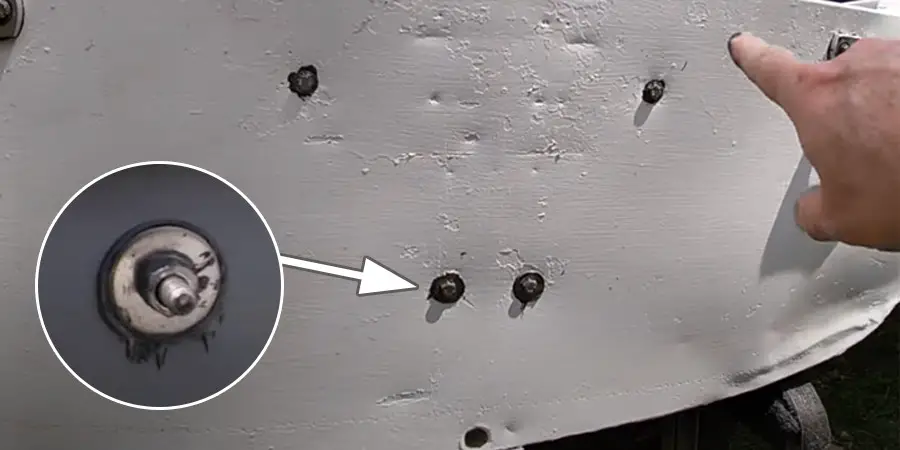
- Insert bolt from the outside (head facing water).
- Place stainless flat washer, isolation washer, and lock washer inside.
- Tighten the nut using a wrench.
🛠 Use a torque wrench to avoid overtightening. Aluminum distorts easily.
Step 6: Torque and Final Inspection
- Torque values (dry threads, general guideline):
- M6 bolts: 7–9 Nm
- M8 bolts: 18–22 Nm
- Reduce by 20–30% if using lubricated threads or thread locker.
- Let sealant cure fully before water exposure (typically 24–48 hours for 5200).
Troubleshooting Common Problems
| Problem | Cause | Fix |
|---|---|---|
| Oversized hole | Drill wandered | Use a larger bolt or insert a rivet nut |
| Corroded rivet | Oxidation | Soak in penetrating oil, drill slowly |
| Threads damaged | Cross-threaded or overtightened | Replace bolt/nut or chase threads |
| Leak persists | Incomplete sealing | Remove and reseal bolt with new washers |
| Bolt contacts aluminum | Missing isolation | Replace washers and reapply sealant |
Leak Testing: Ensure Watertight Seal
After sealant cures:
- Fill the boat hull with 2–3 inches of water.
- Place it on a dry surface.
- Look for leaks under each bolt.
- If leaking, remove and reseal the faulty bolt.
Long-Term Maintenance and Inspection
- Inspect bolt areas once per season.
- Check for movement, water staining, or corrosion.
- Re-torque bolts if needed.
- Reapply sealant to any cracking or separation.
- Replace any washer or isolation ring that degrades.
Legal, Warranty, and Compliance Notes
- Boat Warranty: DIY rivet replacement can void warranties. Confirm terms with your manufacturer first.
- USCG Compliance: Any structural work must follow Coast Guard safety guidelines.
- Insurance: Notify your marine insurer of structural repairs or modifications. Unreported changes may affect claims.
Conclusion
Replacing aluminum boat rivets with bolts is effective—if done carefully. Use 316 stainless bolts, always isolate dissimilar metals, and apply aluminum-compatible marine sealant. Follow safe drilling practices and proper torque to avoid damage.
Done right, this upgrade keeps your boat dry, strong, and easier to maintain season after season.
Frequently Asked Questions (FAQ)
Can I use aluminum bolts instead?
No. Aluminum bolts are too soft and corrode quickly. Use 316 stainless with isolation washers.
Do I need to seal every bolt?
Yes. Always use sealant on every bolt to prevent leaks, especially below the waterline.
What happens if I skip isolation washers?
Direct contact causes galvanic corrosion. This will degrade the aluminum hull over time.
Should I replace all rivets with bolts?
No. Replace only leaking or damaged rivets unless advised by a marine technician.
Read More:
Types of Pop Rivets
Types of Solid Rivets
You didn’t mention about how to access the inside part of the hull when replacing rivets. That is the harder part of the process.
I’m not familiar with the specific design of your boat. SO, If you lack direct access to the interior of the hull, it may be necessary to detach the upper section of the boat. I recommend conducting further research on the internet, as there are informative articles available that discuss the process of separating the hull from boat.