Changing a kitchen faucet can be intimidating, especially if you need to know more about basic plumbing. But if you take the time to catch the process and gather the necessary materials, you can remove the plastic nuts on your kitchen faucet in no time.
In this guide, we’ll walk you through the steps for removing plastic nuts on your kitchen faucet so you can confidently upgrade your kitchen.
Why Do You Need To Remove Plastic Nuts On The Kitchen Faucet?
You may need to remove the plastic nuts from your kitchen faucet for several reasons. Some of the most common reasons include:
Clean The Faucet
The most common reason for removing plastic nuts on a kitchen faucet is to clean the faucet. Over time, faucets can accumulate dirt and grime the faucet and the plastic nuts, making it difficult to turn the faucet off and on. Removing the plastic nuts can help you clean the faucet and make it easier.
Repair Or Upgrade A Leaky Faucet
You might need to replace your kitchen faucet if it is old or damaged. To do this, you’ll need to remove the plastic nuts from the faucet to install a new one.
For whatsoever reason, you need to remove your plastic nuts; here are some ideas for how to do it. Stay with me for more information.
How To Remove Plastic Nuts On Kitchen Faucet
The limited space in kitchen faucets adds a level of complexity to the task at hand, making it impractical to use standard pliers or wrenches. In such cases, acquiring or creating specialized designed tools for this purpose becomes necessary. Below, I provide a detailed discussion on professional and die tools.
Telescoping Basin Wrench
The telescoping basin wrench consists of a long, narrow handle that can be extended or retracted to adjust its length. This telescoping feature allows you to customize the tool’s reach to fit the specific needs of your faucet. The handle is typically made of sturdy metal for durability.
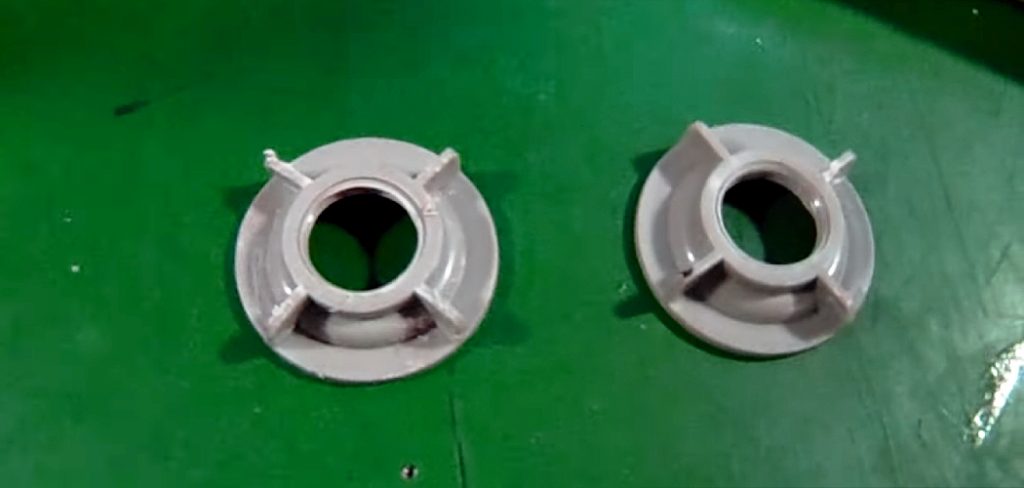
The wrench, commonly referred to as a Plumbing Wrench Faucet, is recognized for its narrow pipe-like shape. This tool features a head with four slots that open up when the wrench is positioned on the plastic nut of the faucet and rotated.
Steps:
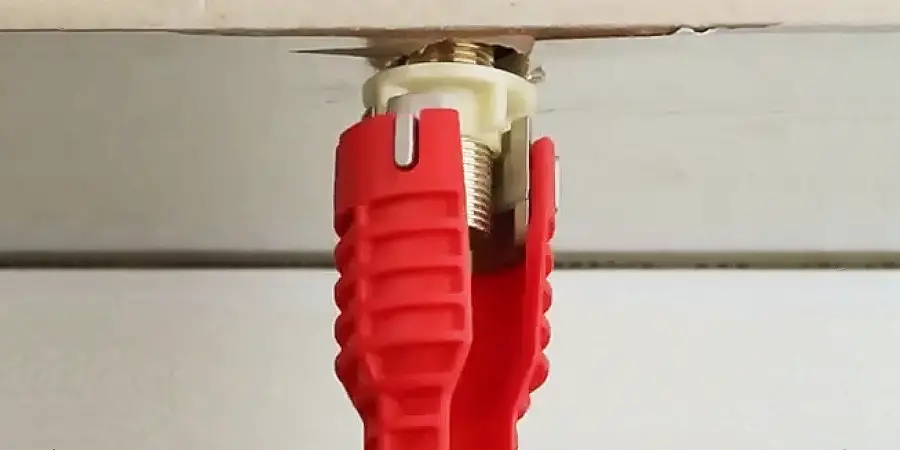
- Position the head of the wrench onto the plastic nut, ensuring that the jaws align with the slots on the nut.
- Once the wrench is securely positioned on the plastic nut, grip the handle firmly and turn it counterclockwise (left) to loosen the nut. Use steady, controlled force to avoid damaging the nut or the faucet. If the nut is stuck or tight, you can use a gentle back-and-forth motion to help loosen it. Be patient and maintain a firm grip on the wrench to avoid slipping.
- Once the nut is sufficiently loosened, you can open the rest of the way with your fingers.
- Depending on your faucet’s design, multiple plastic nuts may secure it. Repeat steps 3 to 6 for each nut until they are all removed.
Pipe-made Opener (DIY)
If you need more professional tools, an alternative method can assist you.
- Here a plastic pipe slightly smaller than the size of the plastic nut should be taken.
- Now cut a slot (as in the picture below) in the middle of any one of the ends of the pipe. The cut area may get stuck in the nut cage.
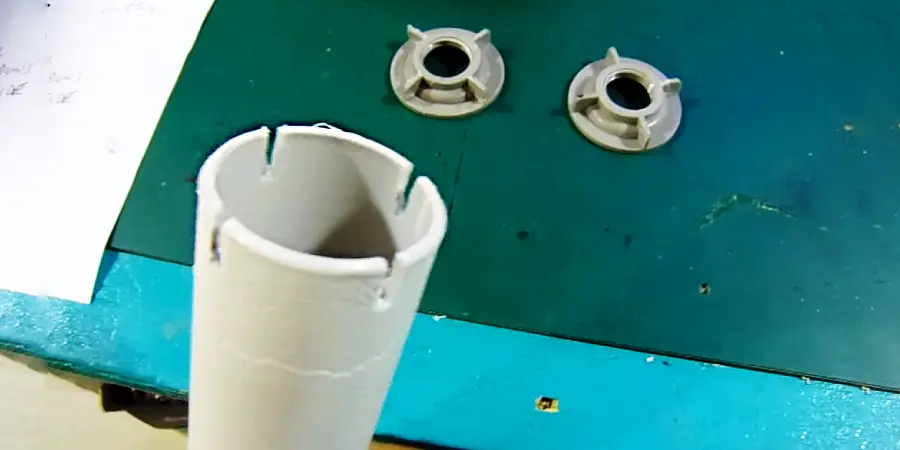
- Now insert the drain pipe with the kitchen faucet plastic nut into the pipe you made and set it on the plastic nut.
- Twist the pipe to open it.
It looks like the Telescoping Basin Orange and works the same way.
Screw Driver & Hammer
If the plastic nut of the kitchen faucet is not excessively tight, you can opt for the screwdriver method, which offers a more straightforward approach.
Just Place the screwdriver into it and exert pressure to rotate it in a counterclockwise direction. You can use a hammer to tap on the screwdriver for added force if necessary.
In this way, you will successfully loosen and open the plastic nut.
Additional Tips
- If the plastic nut is too tight to loosen with a wrench, use a heat gun or hair dryer to heat the nut. It will expand the plastic and make it easier to remove. However, you must avoid overheating the plastic, which could damage it.
- You can try gently tapping it with a hammer. This can help break down any buildup of erosion or debris holding the nut in place.
Alternative Method: Make a Cut in the Plastic Nut
If you need a different method, you should try a newer method I have used, but you cannot reuse the nut.
- A rotary tool with a cutting wheel is best for this job. However, you can use hacksaw carbon steel blades if you do not have one. It consumes more time and effort, but it is possible.
Safety: Before beginning the cutting process, put on safety glasses and gloves to protect yourself. - Hold the rotary tool or hacksaw blade on the Plastic nut and start cutting it at a 45-degree angle. Do the cutting slowly, as you are not immensely skilled, and be careful not to overcut, as it can damage the surrounding material.
- Stop cutting the plastic nut when you are almost done. Just use a pair of pliers to hold the nut and tighten it slowly. You’ll find that the plastic nut will come off quickly. And that’s it – you’re done!
FAQ’s
Is There A Way To Free A Stuck Plastic Nut On A Kitchen Faucet?
To loosen a plastic nut stuck on a kitchen faucet, use a heat gun or blow dryer to warm the nut, or apply a lubricant such as WD-40, RP-90, or JENOLITE Silicone Spray. This should help loosen the nut.
Are Kitchen Faucet Plastic Nuts Reusable?
Yes, you can reuse the plastic nut As long as it is in excellent condition and has not been worn down. However, since this item is inexpensive, it is best to use a new one for optimal performance.
Why Use Plastic Nuts In Kitchen Faucets?
Plastic nuts are an excellent choice for kitchen faucets due to their durability, rust resistance, insulation against moisture, and ease of installation. It’s making them ideal for this application.
Conclusion
This article provided the knowledge and tools to successfully separate Plastic Nuts from Kitchen Faucets. If any new methods are discovered, I will update the article to meet your requirements.
If you benefited from this article, please comment and share it with others who require assistance. Let’s work together to make the procedure simpler for everyone!
Read More – How To Remove Plastic Locking Shelf Clips
